The other core of the academy is the trainees, so the system provides you with the most straightforward steps to manage your academy trainees.
To manage your trainees:
- Click the Trainees tab from the sidebar, and a table of the academy trainees shows alongside their data.
- Click the Settings tab.
- Check the Login with Classera checkbox to allow users to log in with their Classera account.
- Check the Hide Signup Form checkbox to hide the sign-up form from the landing page.
- Check the Trainees Verification checkbox to activate the trainees’ verifications by sending a code to their emails.
- Check the corresponding checkbox to allow trainees to cancel course enrollment.
- Check the corresponding checkbox to hide the certificate description from the trainee.
- By choosing from the drop-down list, you can give the trainees another role, like an admin role or/and a trainer role.
- Click Save to update your settings.

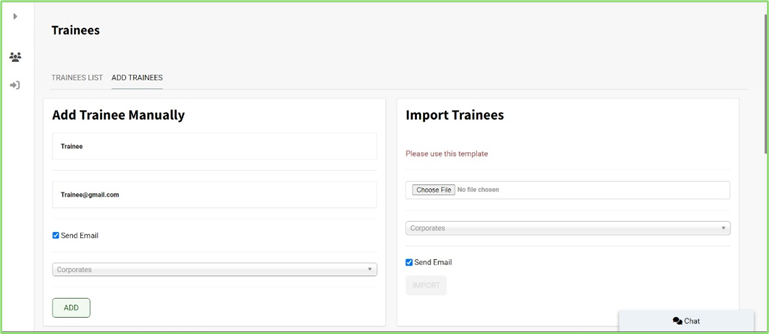
To add trainees:
- Click the Trainees tab from the sidebar.
- Click the Add Trainee tab.
- Add the trainees manually by typing their names and emails, then click the Add button, and the system will create the passwords, or download the template of the Excel sheet and fill it with the trainees’ data, and then upload it to import all trainees at once and click Import.
Note: You can email the trainees to inform them of the password.
To manage registration fields:
- Click the Trainees tab from the sidebar.
- Click the Manage Registration Fields tab.
- Type the field title, both in English and Arabic.
- Choose the field type from the drop-down list.
- Check the corresponding checkboxes according to your preference.
- Click on the field size you want.
- Type the validation pattern or choose from the Examples drop-down list.
- Click Create to add your field to the registration form.
Use the Extra Registrations Fields to arrange, edit, and delete fields by clicking the up and down arrows.


