Table des Matières
Prerequisites #
- Ensure that administrators have created the course as a specialization type.
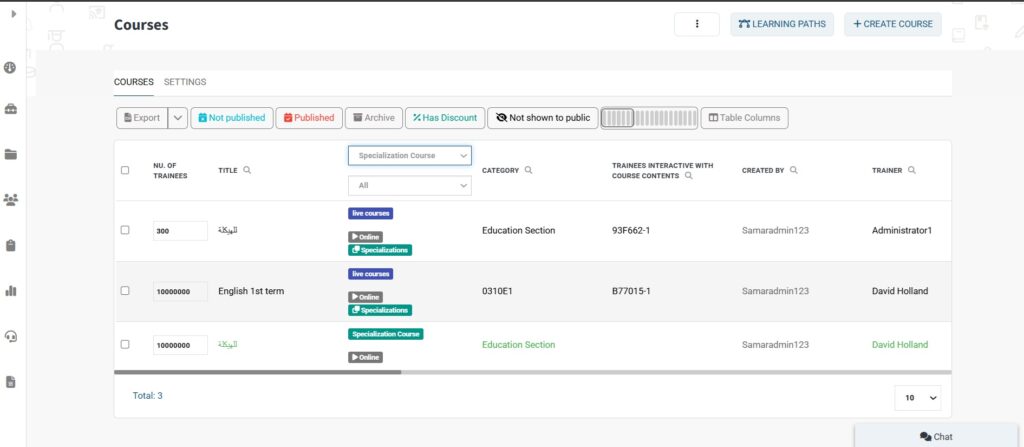
Accessing Specializations #
- Click the Specializations tab from the sidebar to open the Specializations table.
Creating a Specialization #
- Click the Create Specializations button.
- Make sure you have added the necessary Specialization Categories first.
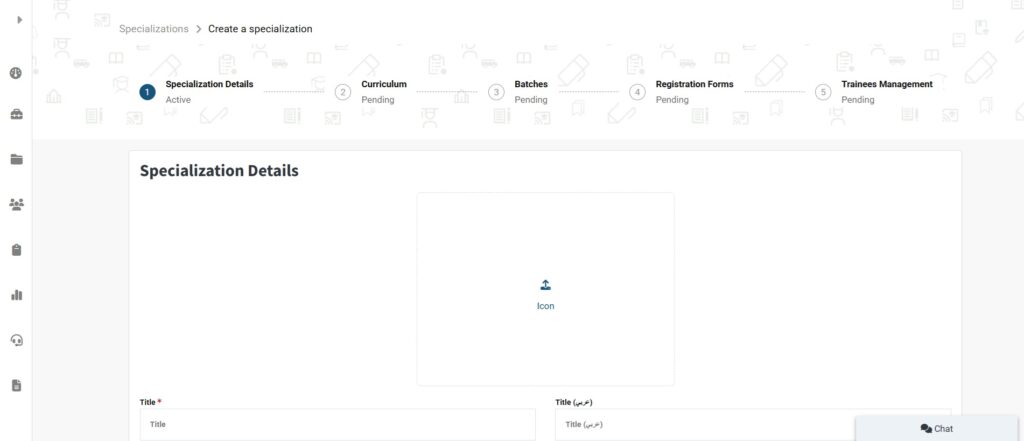
- In the Create Specializations form, enter the Specialization Title in both English and Arabic.
- Fill in the required details in both English and Arabic.
- Add Specializations Team & Rules if needed.
- You can review the Specializations Structure from this section.
- When finished, click Create to proceed to the next step.
Adding Curriculum Levels #
To add Curriculum Levels, continue to the next section.

Managing Curriculum, Batches, Registration Forms, and Trainees #
Curriculum #
- Add a title in both languages (e.g., English and Arabic).
- Specify the curriculum period and registration period.
- Set the required progress to pass (as a percentage).
- Click Create.
- Click the dropdown arrow next to the newly created curriculum.
- Click Add Course to add the desired courses to this curriculum (ensure the courses are of specialization type).
- When you finish adding courses, click on Next Step.
Batches #
- Click Create Batch. Add a title in both languages.
- Fill out the rest of the required fields. Click Create.
- Scroll down to select a trainer for this batch. Click
- Save Courses, then Next Step.
Registration Forms #
- Type the name for the submission button.
- Add a submission message.
- Click Create Form.
- Click the dropdown menu next to the newly created form.
- Click Form Editor to customize your form.
- Click Publish Now, then Next Step.
Trainee Management #
- View the list of trainees who have filled out the form and submitted their application to this batch.


