Table des Matières
The first step to start your training journey is creating courses. We provide this easily and clearly.
To create a course: #
- Click the Courses tab from the sidebar, and the Courses table shows. It’s created in an easy way for you to be able to search for a specific course.
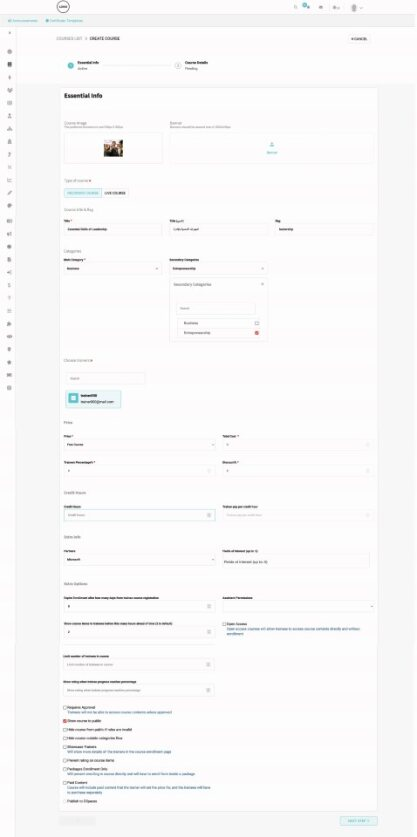
- Click the Create Course button.
- Upload a course image. It will be the main image of the course on the Courses page.
- Upload a course banner. It will be shown on the Course Details page.
- Select Course Category. Choose whether your course is a General course or a Specialization course.
- Define General Course Format If you selected General, choose your delivery method:
- Recorded: For pre-recorded video content.
- Live: For real-time sessions.
- Set Location for Live Courses If you chose a Live format, specify the course location:
- Online: Conducted via virtual meeting platforms.
- Onsite: Physical classroom setting.
- Hybrid: A mix of both online and physical attendance.
- Select Specialization Format If you selected Specialization, choose the applicable format directly from the following options:
- Online
- Hybrid
- Onsite
- Recorded
- Add the course title, both in English and Arabic, and add the flag, a unique ID for this course.
- Select the main category and the subcategory for this course.
- Choose the trainer. (The search bar can make it easy.)
- Choose whether you want this course to be free or paid and if paid, type the total cost of the course, the trainer’s percentage, and the discounts.
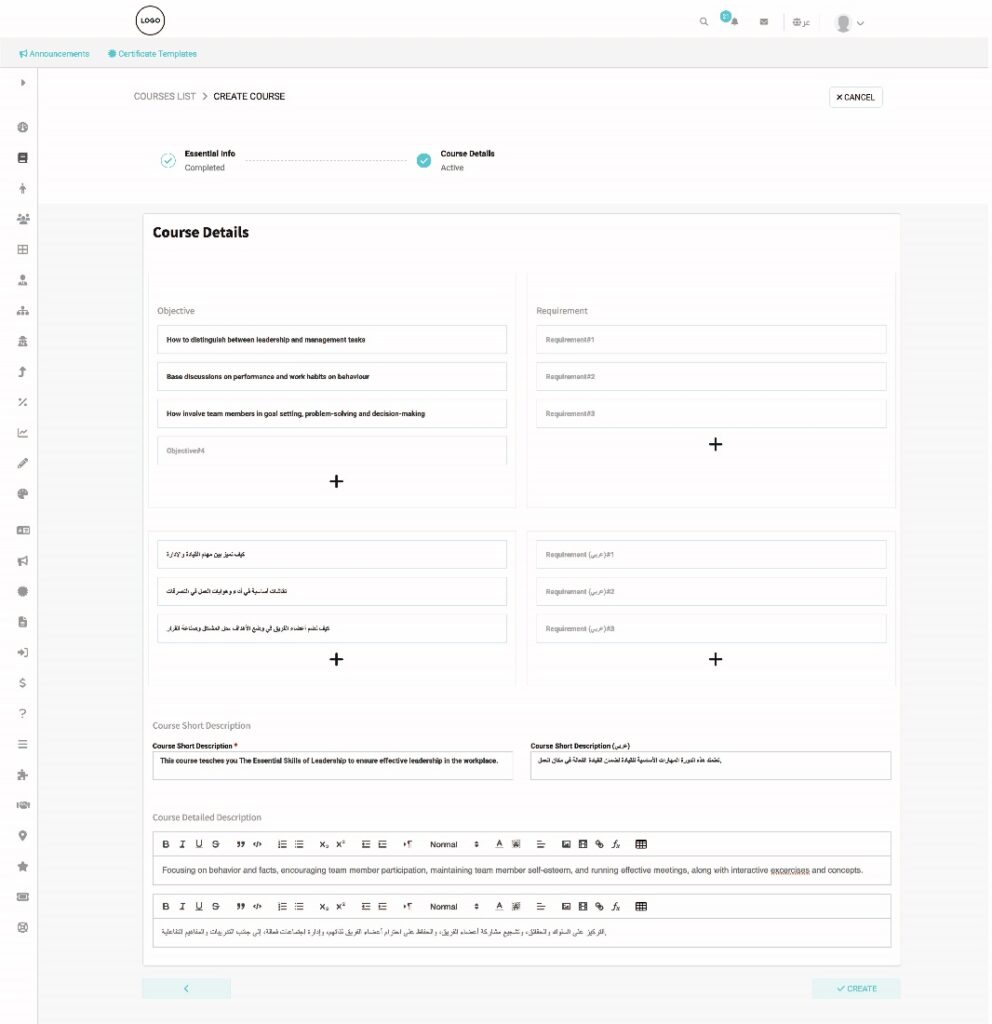
- Enter the course objectives and requirements in both languages.
- Enter the short and detailed course descriptions in both languages.
- Click Next Step to add detailed information about the course.
- Add this course’s short and detailed description, both in English and Arabic. Enter the course objectives and requirements in both languages.
- Provide the short and detailed course descriptions in both languages.
- Select the course start and end dates.
- Click Create to launch your course.