Table des Matières
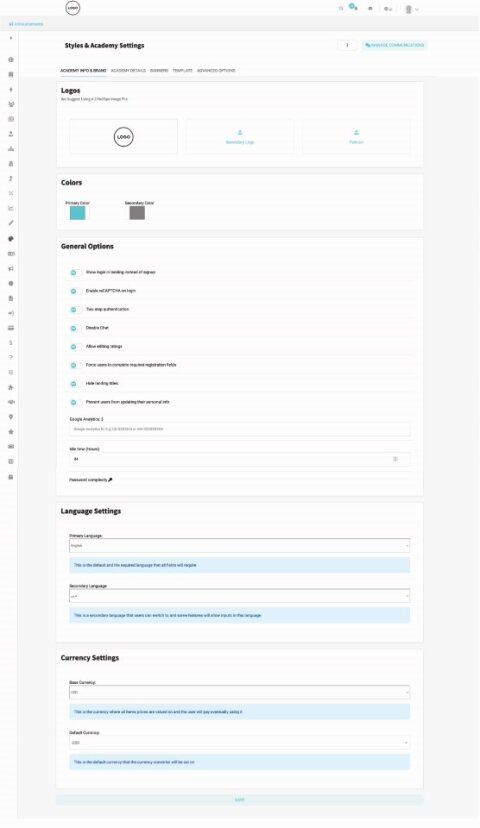
This page allows you to adjust and customize your academy according to your preference.
To manage styles and academy settings: #
- Click the Styles & Academy Settings tab from the sidebar.
- Upload your main logo, secondary logo, and favorite icon.
- Adjust your primary and secondary colors by clicking them and choosing the required color. These are the colors of your academy interface.
- Use the toggles to adjust the general options according to your preference.
- Click the Password Complexity button to manage settings like the password length and components. Don’t forget to save!!
- Choose the primary and secondary languages.
- Choose the base and the default currencies.
- Click Save to save your settings.
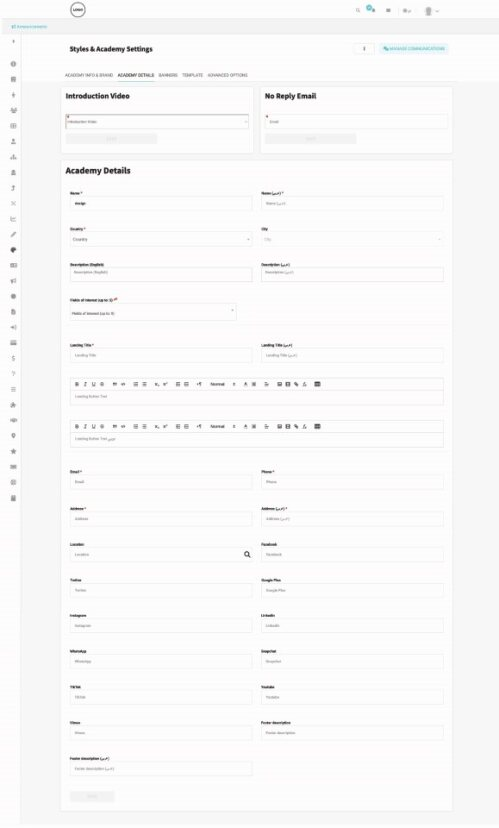
To manage academy details: #
- Click the Styles & Academy Settings tab from the sidebar.
- Click the Academy Details tab.
- Add a No Reply Email with which the users can contact the academy.
- Add the academy details like its name, country, email, etc.
- Click Save to save your settings.
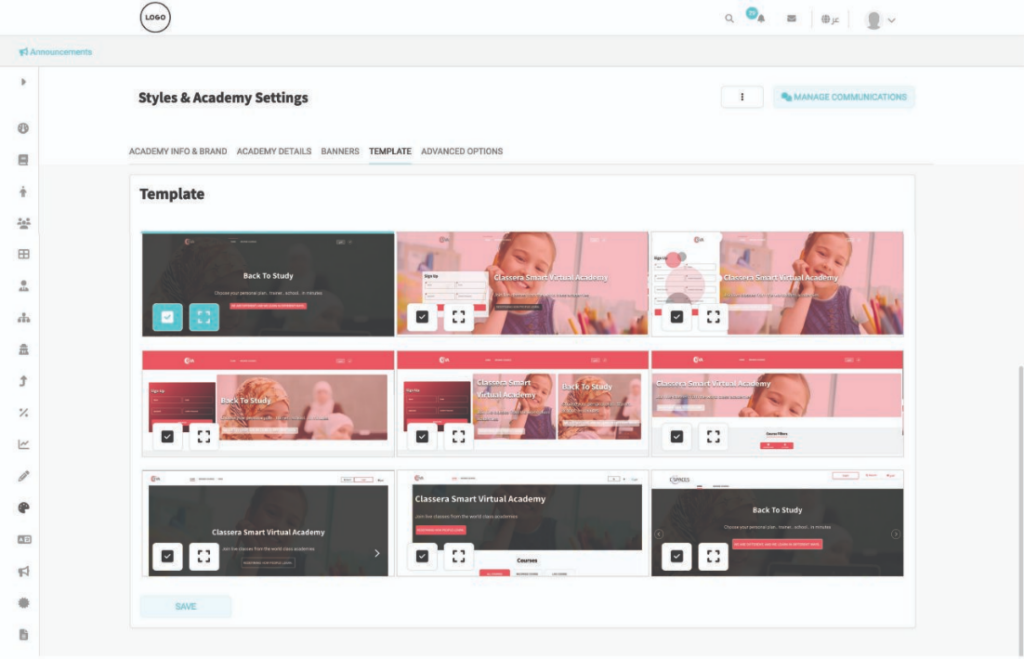
To manage banners: #
- From the sidebar, click Styles & Academy Settings.
- Open the Landing Page tab.
- Click the pencil icon in the Banners section.
- Enter the banner title in both English and Arabic.
- Enter the button text in both English and Arabic.
- Enter a description for the banner in both English and Arabic.
- Upload the main banner image. (Recommended size: approximately 1440 × 749 px for proper display on the landing page.)
- Upload the mobile banner image. (Recommended size: approximately 425 × 749 px for proper display on mobile devices.)
- Click Save to apply your changes.
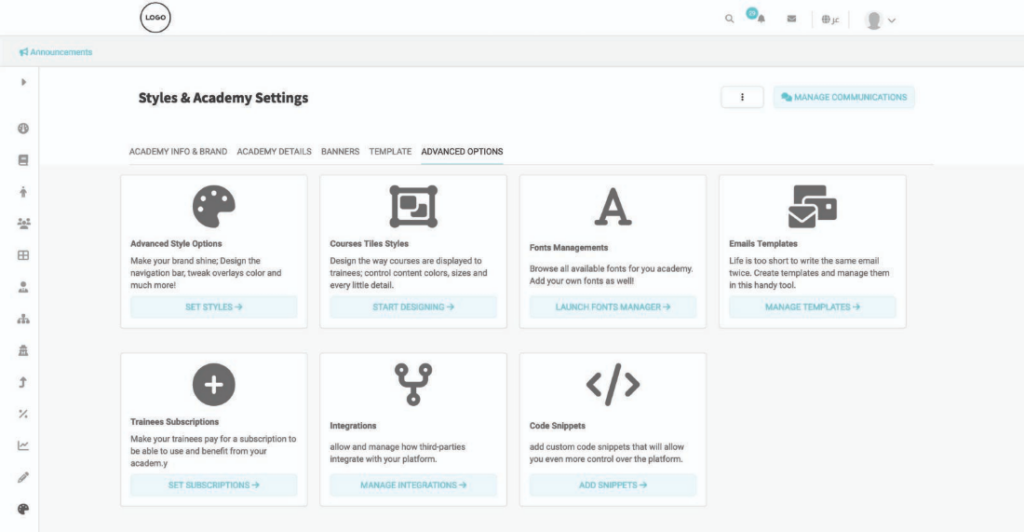
To manage advanced options: #
- Fine-tuning your Academy. Ready to dive deeper? You can customize your academy’s look and feel by heading to the Styles & Academy Settings in your sidebar and selecting Advanced Options. Here’s what you can do once you’re there:
- Design & Style: This is your creative hub. Adjust everything from your brand colors and fonts to the layout of your login pages and footers.
- Typography: Browse our library of fonts or upload your own custom brand fonts to keep things consistent.
- Email Communication: Take a look at your automated emails and tweak the templates so they sound just like you.
- Subscription Plans: Set up your pricing and decide how long trainee memberships should last.
- Smart Integrations: Connect your favorite tools. For example, you can make life easier for your users by letting them sign in with their Microsoft accounts.
- Custom Code: If you need more granular control, you can drop in your own code snippets here.
- Security & Access: Keep your platform safe by managing which devices are allowed to access your academy.